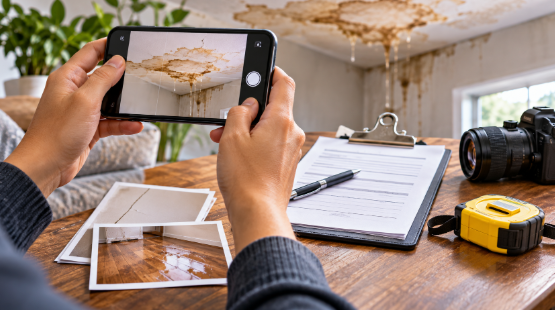
You walk in and find a ceiling stain the size of a dinner table and a puddle creeping down the hallway. Your first instinct is to grab towels. Your second should be to grab your phone.
Here is how to document property damage for an insurance claim in one sentence: photograph and film everything before you clean up, show each space from far away and up close, capture the source of the damage, and write down what each damaged item is, when you bought it and what it cost. Then save the files somewhere safe. The rest of this guide turns that into a checklist you can follow even when you are stressed and short on time. Policies differ, so treat it as general guidance and check your own policy for specifics.
Start With Safety, Then Document Before You Clean Up
Make sure the space is safe first, then capture the damage before you move, wash or throw away anything. If a ceiling is sagging, water is near outlets or you smell gas, stay out and call the right professionals before you take a single photo.
Once it is safe, resist the urge to tidy. The NAIC, the organization of state insurance regulators, points out that your insurer needs an accurate account of the loss. Its advice is to photograph or film everything and list damaged items before removing debris or belongings.
After you have documented, take reasonable steps to stop further damage. Insurers call this mitigation. That might mean covering a hole in the roof with a tarp or boarding up a broken window. The NAIC notes that these costs are typically reimbursed when the loss is covered, so keep every receipt.
Report the loss early, too. Most insurers set a time limit for reporting a claim, and the length depends on your policy. You do not need a finished photo library before you call. Report first, then keep documenting while you wait for the adjuster.
How to Document Property Damage for an Insurance Claim: The Capture List
Take four kinds of shots in every affected space: wide, medium, close-up and source. Together they tell an adjuster what happened, where and how far it spread. Here is a checklist to run through room by room:
- Wide shots. Stand in each corner and photograph the whole room so the full extent of the damage shows. Amica, a home insurer, recommends whole-room shots as the starting point.
- Medium shots. Frame one wall, one section of floor or one piece of furniture so a reviewer can see where the damage sits in the room.
- Close-ups. Photograph stains, cracks, warped boards, scorch marks or broken glass. Place a coin or tape measure beside the damage to show scale.
- The source. Capture the burst pipe, the failed appliance hose, the missing shingles or the fallen branch. A claim often turns on what caused the loss, so show it.
- Labels and serial numbers. Photograph the data plate on appliances, electronics and equipment. These small details help prove exactly what was damaged.
- Temporary repairs. Photograph tarps, boards and any other emergency measures, and keep the receipts beside the pictures.
Turn on date and time stamps if your camera offers them. Most phones also store the date and time inside each photo file, so keep the original files and work on copies if you crop or annotate anything. Keep the blurry shots too; a complete set is more believable than a polished one.
Picture a dishwasher hose that fails overnight. Your set would include the whole kitchen, the swollen floorboards, the split hose and the appliance’s serial plate. That is about fifteen minutes of work.
Record a Video Walkthrough Your Adjuster Can Follow
A narrated video walkthrough for insurance shows how rooms connect and gives context that still photos cannot. Amica suggests recording a quick walkthrough and pointing out major damage as you move through each room.
Keep each clip to a few minutes and name it by room. Video supports your photos; it does not replace them, so take the key stills first.
How to Document Water Damage Before It Spreads
Water damage changes by the hour, so capture it first and start drying right after. Photograph the source, the wet areas and the edges of the damage, such as water lines on walls, swollen baseboards, bubbling paint, soaked carpet and damp ceilings. Take a second set of photos once water has been removed and again when drying equipment is in place, so the timeline is visible.
Speed matters here for more than the claim. FEMA’s guidance on flooded homes says that anything which cannot be cleaned and dried within 24 to 48 hours should be removed, and it warns that mold can develop even when no other damage is visible.
That timeline can clash with the advice to save damaged items for your adjuster. The practical answer is to document first and ask second. Photograph and list the item, capture its label, and tell your insurer what you plan to do. Ask whether they want to inspect it or whether detailed photos will do. If something is unsafe to keep, such as a soaked mattress or porous material that has sat in dirty water, do not hold on to it just for the claim.
Build a Photo Inventory for Insurance
A photo inventory for insurance pairs each damaged item with a picture and a few key facts. It is the part of a claim that most people underestimate, because memory fails fast after a loss. Amica’s sample inventory lists the room, the item, the purchase date and the value. Add the serial number if there is one.
For each item, record these details:
- Room and location, such as “living room, by the window”
- Item name, brand and model
- Serial number, if it has one
- Purchase date and price, or “inherited” with an appraisal if you have one
- Condition and what happened to it
- The photo or video file that shows it
No receipts? Amica suggests searching your email for old order confirmations, which often show the item, date and price. Bank and card statements can fill gaps as well. If you have nothing at all, the NAIC says to start a list of lost items room by room with as much detail as you can.
If you have no inventory yet, you are not alone. A Triple-I survey of homeowners in 2023 found that only 47 percent had one. Building one after a loss is slower, but a room-by-room list from photos and memory beats a vague total.
Organize Your Files So the Claim Moves Faster
Keep everything in one place, name files clearly and store a second copy elsewhere. A tidy file is easier to review than a camera roll with 400 unlabeled images.
A simple setup works well. Create one folder named with your claim number, and add subfolders for Photos, Video, Receipts, Estimates, Inventory and Communication. Name files so they sort by date and room, like “2026-11-05_kitchen_wide_01.jpg”. Back the folder up to cloud storage or a second device, since the phone holding your only copy may be damaged too.
The communication folder deserves special attention. Note the date, the person you spoke with and what was promised each time you talk to your insurer or a contractor. Save emails and written estimates.
Send copies to your insurer and keep the originals. Many insurers have an upload portal, so ask which format they prefer.
When a Restoration Team Can Help With Documentation
If the damage is more than you can manage, a restoration contractor can take over drying, cleanup and repairs, and a good one keeps its own records. Moisture readings, equipment logs and itemized estimates add detail that phone photos cannot. The NAIC adds that your adjuster may want to review estimates before repairs begin, so share them early.
Some companies that provide insurance-approved property restoration assign a project manager who works with your carrier, points you to sources for replacement materials and flags deadlines along the way. That kind of coordination can take pressure off, but it does not replace your own records. Keep your own folder either way.
Choose carefully after a big event. The NAIC warns that repair fraud is common after disasters, and it advises getting more than one bid, never feeling rushed to sign, and paying in installments rather than all up front. The insurer’s adjuster assesses damage at no cost to you. Public adjusters offer similar services, but you would pay their fees.
Common Documentation Mistakes That Slow Claims Down
Most delays trace back to timing and gaps. These are the ones to avoid:
- Cleaning up first. Once the debris is gone, so is the evidence of what it looked like.
- Only close-ups, or only wide shots. You need both, plus the source.
- Skipping the cause. Damage without an explanation invites questions.
- Relying on memory. An unwritten inventory shrinks quickly after a loss.
- Deleting “bad” photos. Keep every original, even the imperfect ones.
- Waiting to report. Time limits vary by policy, and your documentation can continue after you call.
Frequently Asked Questions
How soon should I document property damage?
Document as soon as the area is safe, and always before cleanup or repairs. Report the loss to your insurer quickly as well, since most insurers set a time limit for claims. The exact deadline depends on your policy, so check it or ask your agent. You can keep adding photos and records after you report.
Do I need receipts to prove what I owned?
Receipts help, but they are not the only proof. Photos, old order-confirmation emails and bank or card statements can show what you owned and what you paid. If you have none, start a room-by-room list with as much detail as possible, including brand, approximate age and cost.
Should I take photos or video?
Take both. Photos capture sharp detail such as labels, serial numbers and cracks. Video shows how rooms connect and lets you narrate what you see. Take your key photos first, then film a slow walkthrough of each affected room.
Should I keep damaged items?
Keep them if it is safe, until your adjuster says otherwise. The NAIC advises saving damaged items for inspection when possible. If an item is unsafe, such as something soaked by floodwater, photograph and list it in detail and ask your insurer before you throw it away.
Do I need a public adjuster?
No. Your insurer sends its own adjuster at no cost to you. Public adjusters offer similar services, but you pay their fees. If you feel overwhelmed, compare what you would get for the cost, and read any contract before you sign.
Make It a Routine, Not a Scramble
The people who handle claims best are rarely the ones with the best cameras. They are the ones with a plan: safety first, then wide, medium, close-up and source shots, a narrated walkthrough, an item list and one tidy folder.
You can practice before anything goes wrong. Spend fifteen minutes this weekend filming your home room by room and saving the file to the cloud. If a loss ever happens, you will already have a before picture, and the same checklist will guide the after.